Tutorial of Simple Decorating Idea Using Trays
Are you ready to explore a creative and budget-friendly way to decorate your child’s room? In this article, we have a delightful idea that not only adds a touch of charm but is also incredibly easy to execute. We’ll be using trays as the foundation for our decorative project. While we’ll showcase a girl-themed concept, feel free to adapt it for boys by choosing different stickers. The best part? You’ll only need a couple of trays and a packet of stickers!
We stumbled upon this brilliant concept during a recent Dollar Tree haul, where we acquired both the trays and stickers, all for under $4.00. The end result is not only visually appealing but also incredibly cost-effective.
This idea was sparked by one of our readers who asked for suggestions on using stickers to create an affordable wall art piece. Well, we’ve answered the call with this crafty and wallet-friendly solution. We hope it not only helps our inquisitive reader but also serves as inspiration for others looking to embark on a similar creative journey.
Let’s dive into the details of this fantastic decorating idea and how you can effortlessly transform your child’s space into a personalized haven.
Materials you will need:
Before we jump into the creative process, let’s gather our materials. Here’s what you’ll need:
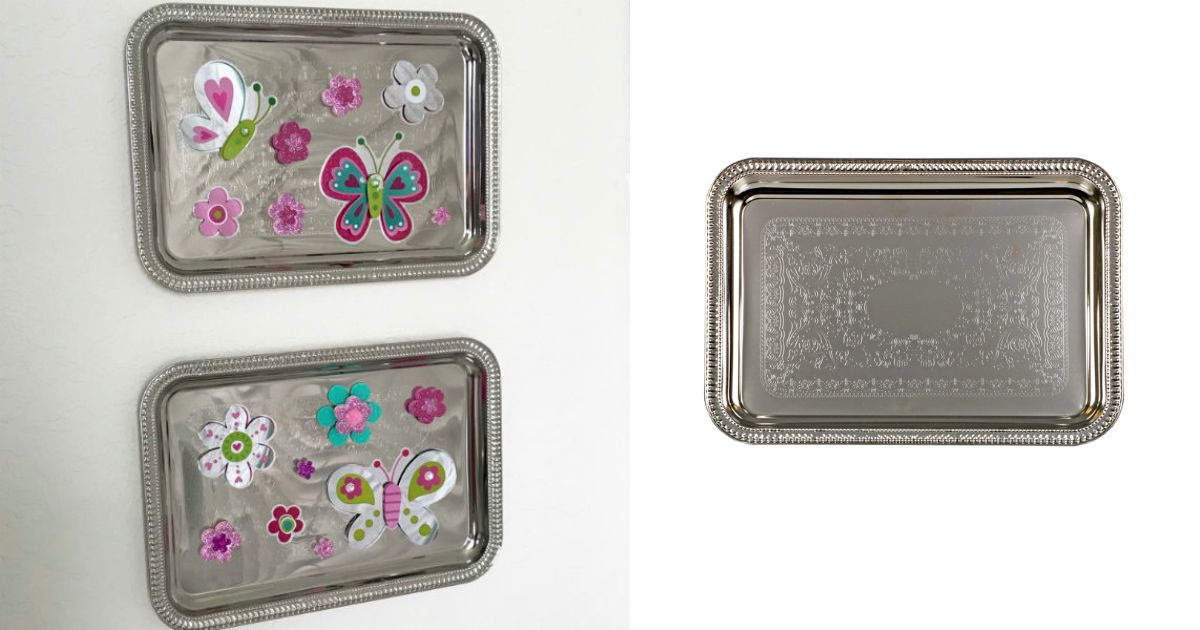
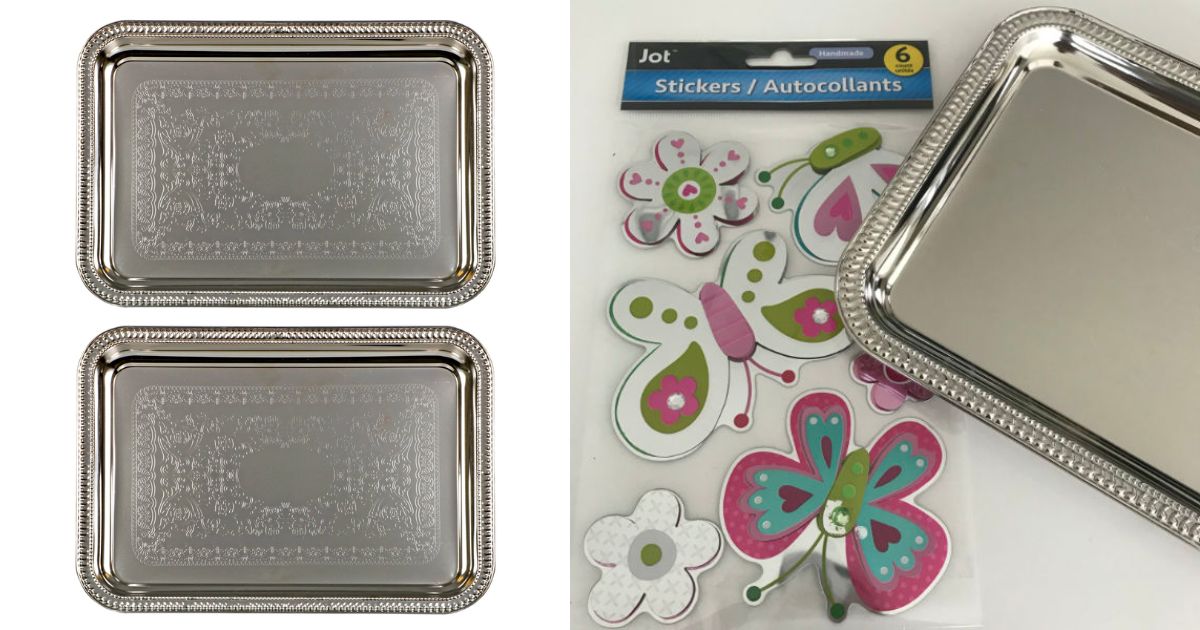
Trays: Opt for trays with a flat surface and a border to keep the stickers in place. You can choose trays in various shapes and sizes to match your room’s decor.
Stickers: Select stickers that align with your desired theme. For our example, we’ve chosen stickers with a vibrant and whimsical design suitable for a girl’s room. However, you can easily customize this by choosing stickers that cater to a different style or gender.
Now that we have our materials ready, let’s move on to the step-by-step process of creating this beautiful decorative piece.
Step by Step
Step 1: Choose Your Trays
Begin by selecting the trays you want to use for this project. Trays come in a variety of styles, so pick ones that match your room’s aesthetic. Whether you prefer rectangular, oval, or round trays, the choice is yours. Consider the size and placement options as well.
Step 2: Prepare Your Stickers
Next, prepare your stickers. If you’re decorating a child’s room, stickers featuring their favorite characters, animals, or objects can make the design truly special. In our case, we’ve chosen an assortment of colorful, nature-themed stickers to create a whimsical atmosphere.
Step 3: Design Your Layout
Now comes the fun part—designing your layout! Lay out the stickers on the tray’s surface, experimenting with different arrangements until you find a composition that appeals to you. Don’t worry; you can easily reposition the stickers until you’re satisfied with the design.
Step 4: Attach the Stickers
Once you’re content with your chosen layout, it’s time to attach the stickers to the tray. Carefully peel each sticker from its backing and gently press it onto the tray’s surface. Ensure that they adhere securely to prevent any peeling later on.
Step 5: Display Your Creation
With your stickers in place, your decorative tray is now complete! Find the perfect spot in your child’s room to showcase your masterpiece. Whether it’s mounted on the wall, placed on a shelf, or used as a charming centerpiece on a dresser, your tray will add a delightful touch to the room.
Step 6: Customize for Boys
For those decorating a boy’s room, adapting this project is a breeze. Simply swap out the stickers for designs that resonate with boys’ interests and preferences. Whether it’s superheroes, vehicles, or sports, there’s a sticker theme that’s perfect for every child.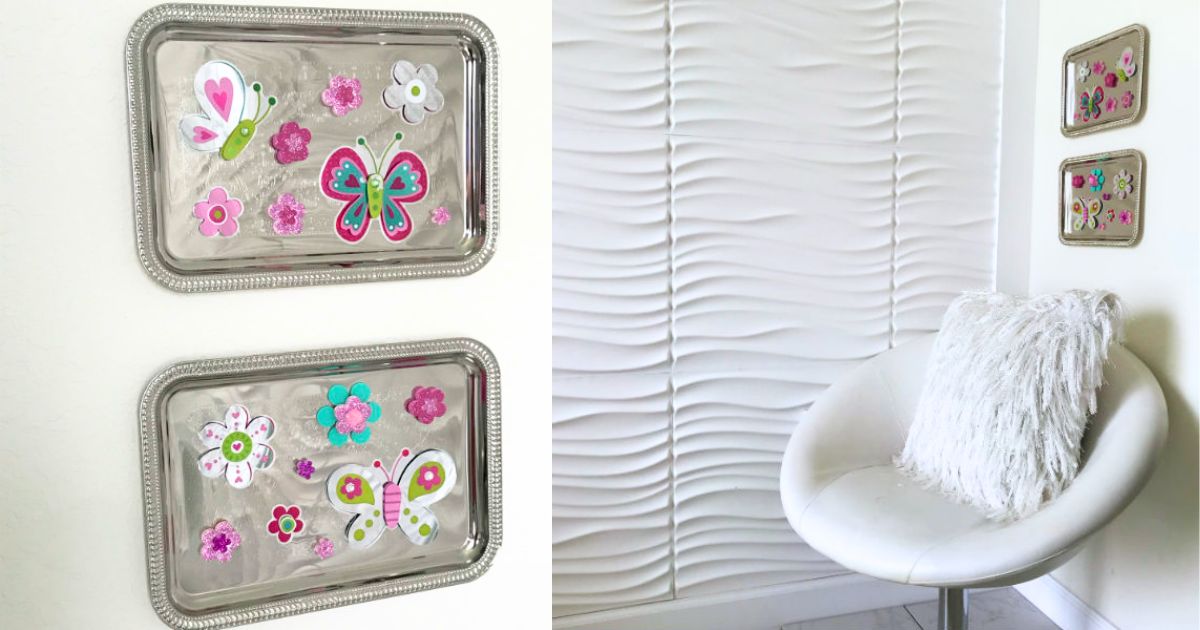
Conclusion on the Idea for Decorating Using Trays:
In conclusion, the “Idea for Decorating Using Trays” is an excellent DIY project to breathe life and personality into your child’s living space. It’s not only budget-friendly but also highly adaptable, allowing you to customize the design to suit your child’s unique tastes and interests. Plus, it’s a fantastic way to get creative and bond with your child while beautifying their room.
So, the next time you’re looking to revamp your child’s space without breaking the bank, consider the endless possibilities that trays and stickers offer. Unleash your imagination, embrace the joy of crafting, and create a room that your child will adore. Happy decorating!
Don’t forget to follow us in our Instagram , YouTube Channel and Facebook Group !!!!
DIY Tutoriales y mucho mas articipates in the Amazon Services LLC Associates Program, an affiliate advertising program designed to provide us with a means to earn money through links to Amazon.com and affiliated sites.
This post contains affiliate links and I may be compensated for this post. Read our disclosure policy HERE
Leave a Reply