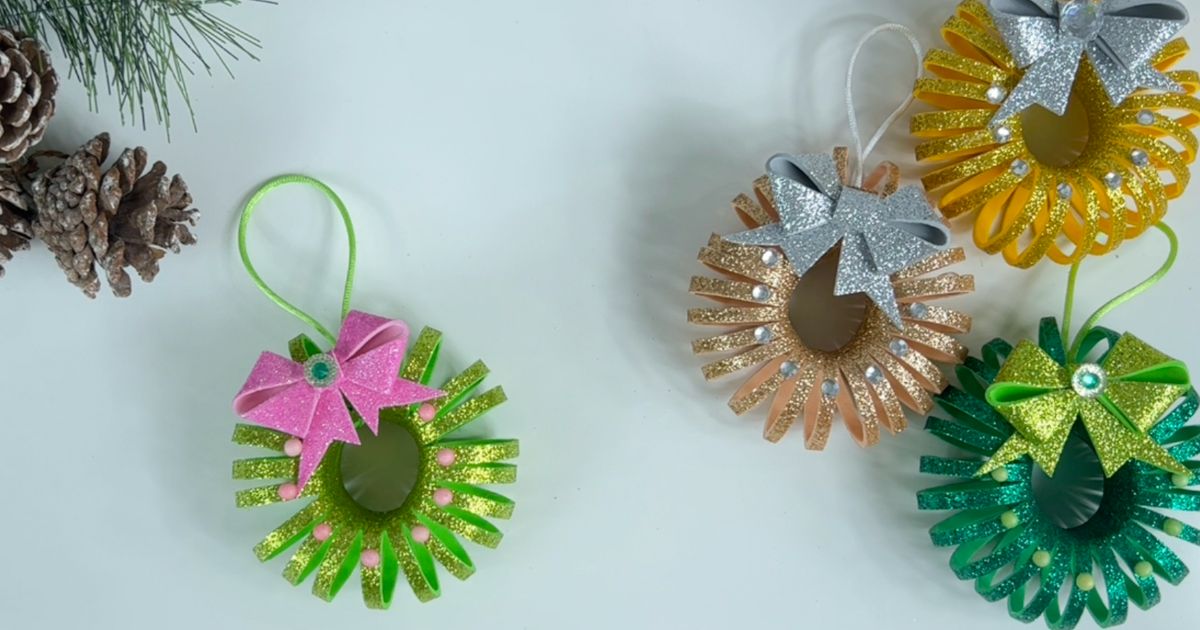
Christmas Tree Ornaments Made of Foam Sheets
The arrival of the Christmas season brings with it a joyful and festive atmosphere, illuminating our homes with bright lights and dazzling garlands. And, of course, the Christmas tree becomes the focal point of all eyes. This year, I invite you to add a personal and creative touch to your tree with handmade ornaments made of foam rubber.
This tutorial is not just a guide to create ornaments; it is an invitation to unleash your creativity. With foam rubber, you can customize your Christmas ornaments in different colors, shapes, and details, tailoring them to your taste and personal style.
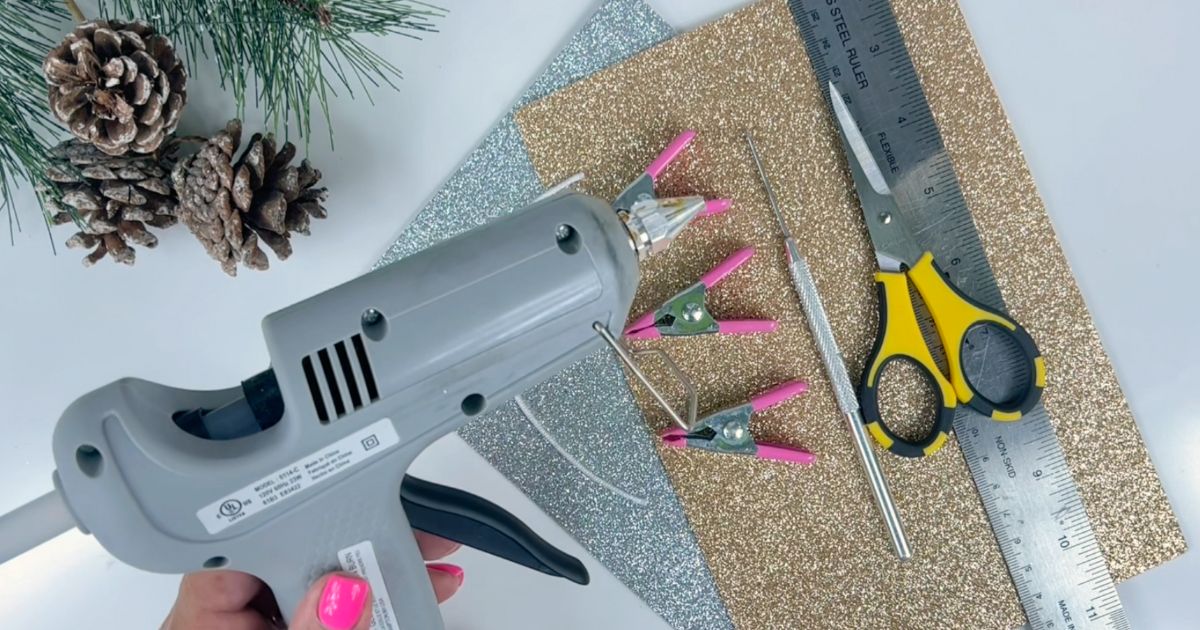
Materials You’ll Need:
Foam sheets in various colors.
Craft scissors.
Craft glue.
Pencil.
Ruler.
Decorative ribbon or thread for hanging.
Beads and/or sequins (optional).
Step-by-Step Tutorial
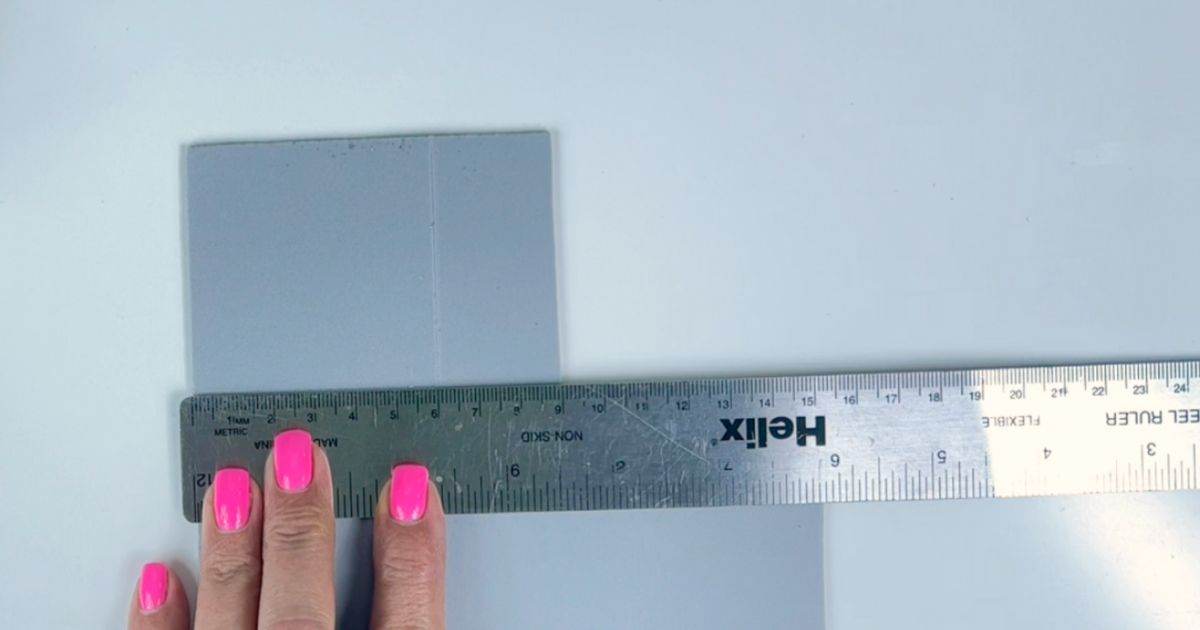
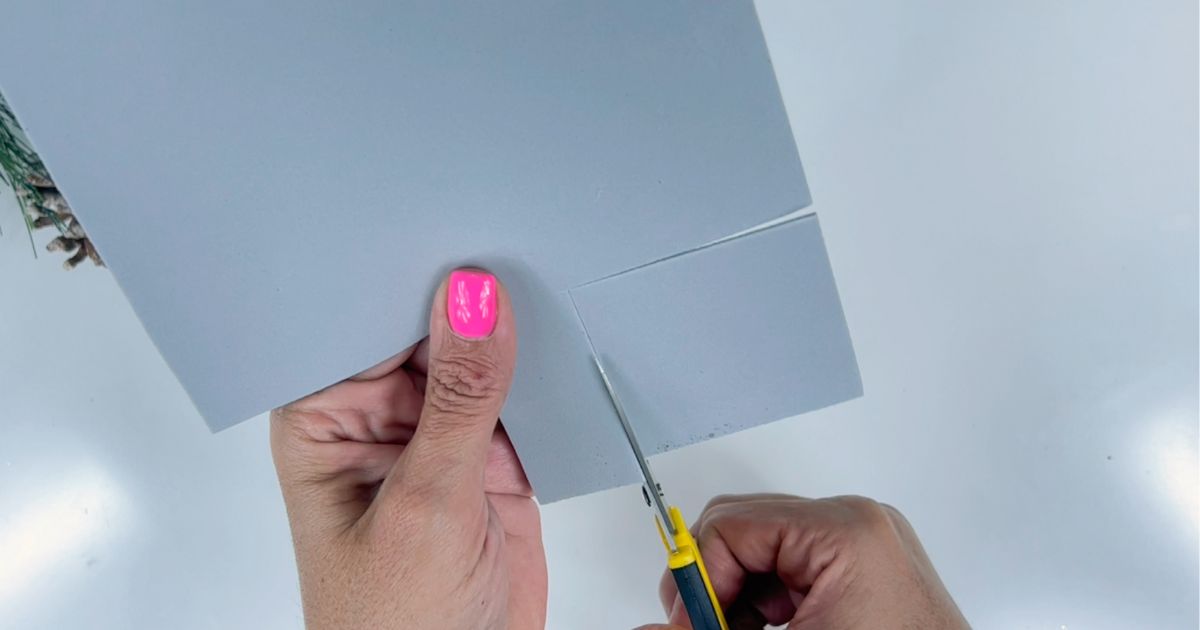
Step 1: Preparation of Materials
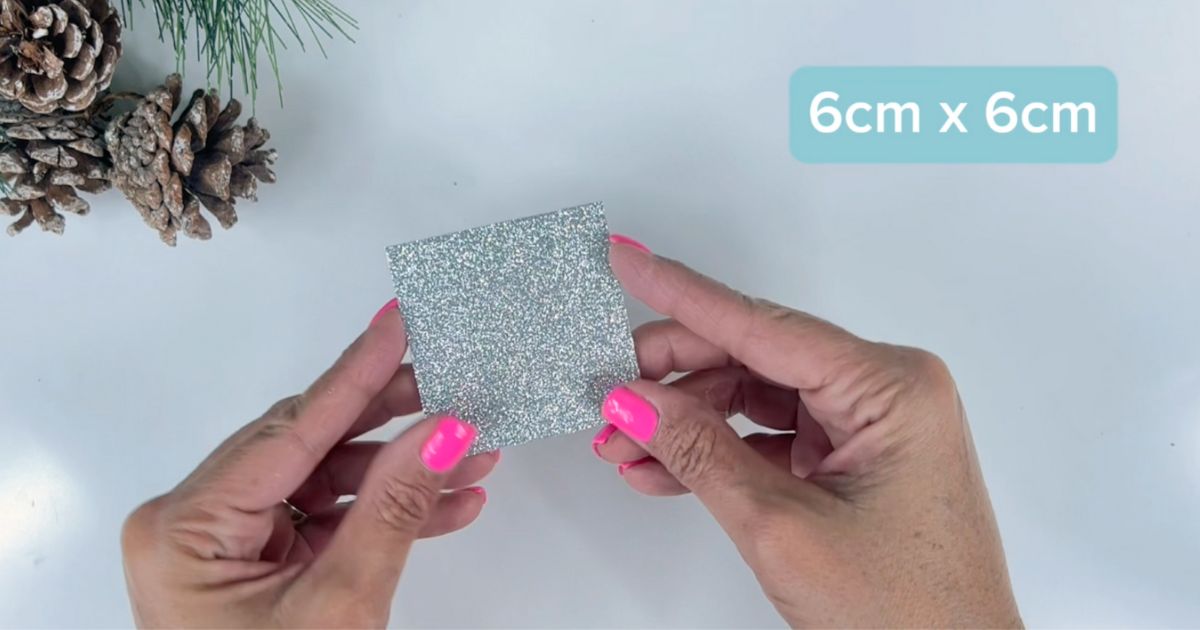
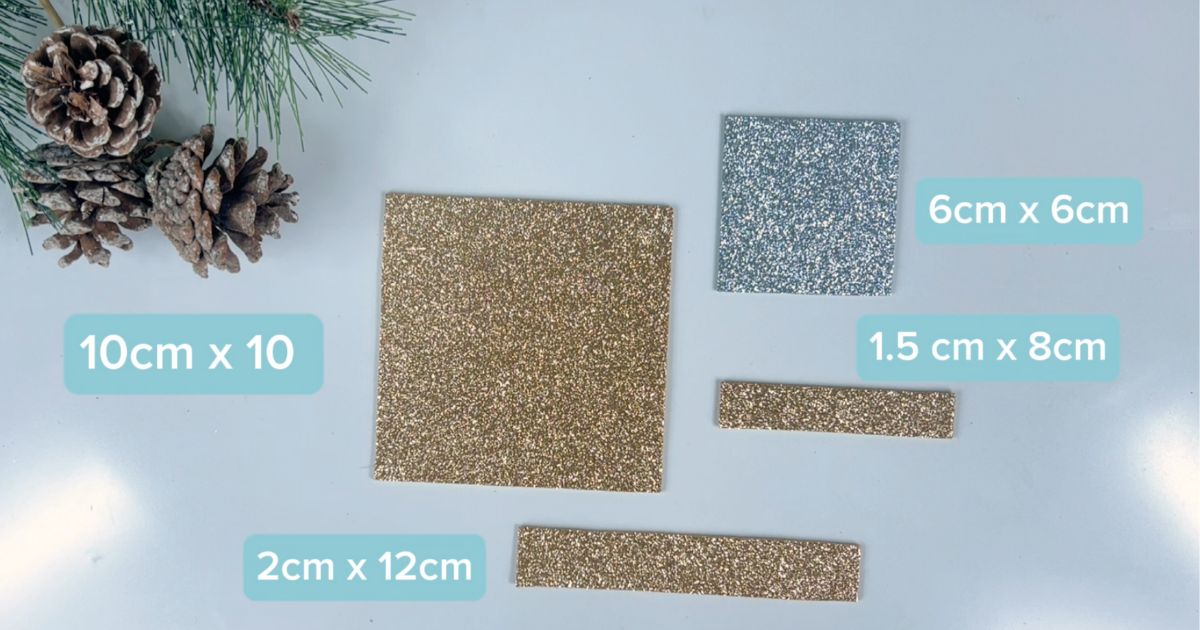
Start by cutting the foam rubber according to the indicated measurements. You will need a 6 cm x 6 cm square, which you will use later for the ornament bow, and another 10 cm x 10 cm square for the base. You will also need strips of 1.5 cm x 8 cm and 2 cm x 12 cm.
This is what the 6 cm x 6 cm piece you will use later for the bow of the ornament looks like.
Step 2: Creating the Base
The 10 cm x 10 cm square will be the base of your ornament. Mark 1 cm on one of the edges to start shaping the form.

Step 3: Join the Two Pieces
Apply hot glue and attach the 2 cm x 12 cm piece right in the space created by the 1 cm mark. Glue it well to the edge, and you will notice an excess sticking out. That’s okay, don’t cut it off.

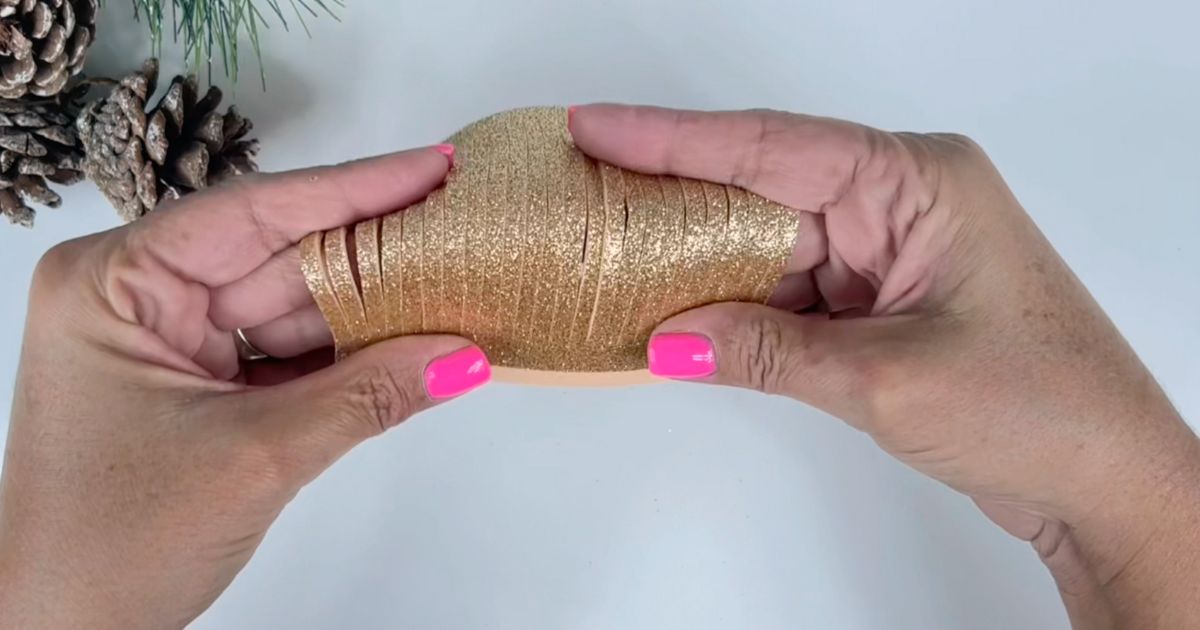
Step 4: Folding the Foam Sheet
Join the two ends of the foam rubber with the decorative side facing inwards. Fix with clamps to maintain the shape while you make cuts along the square without exceeding the 1 cm strip.
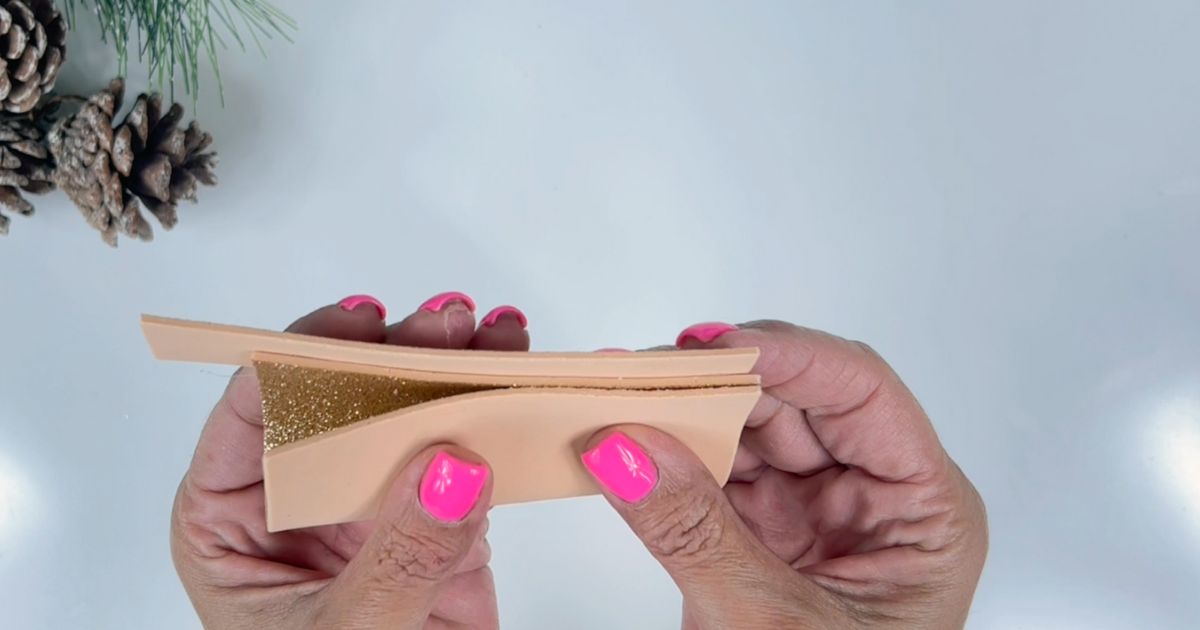
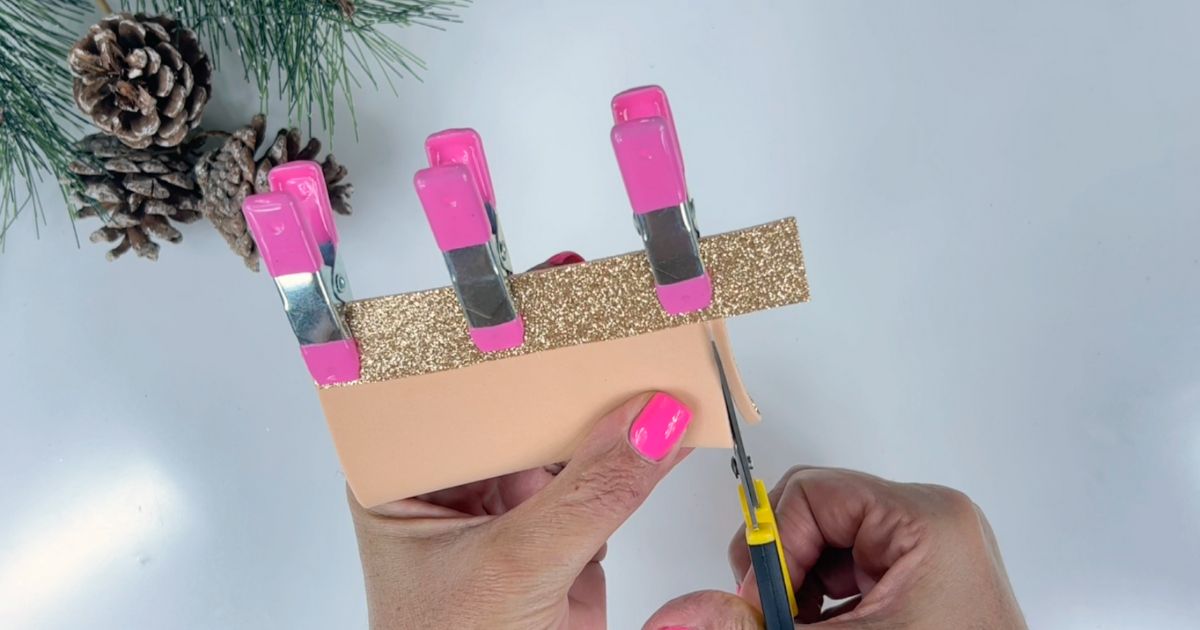

It should look something like this.
Step 5: Close by joining the two parts with hot glue.
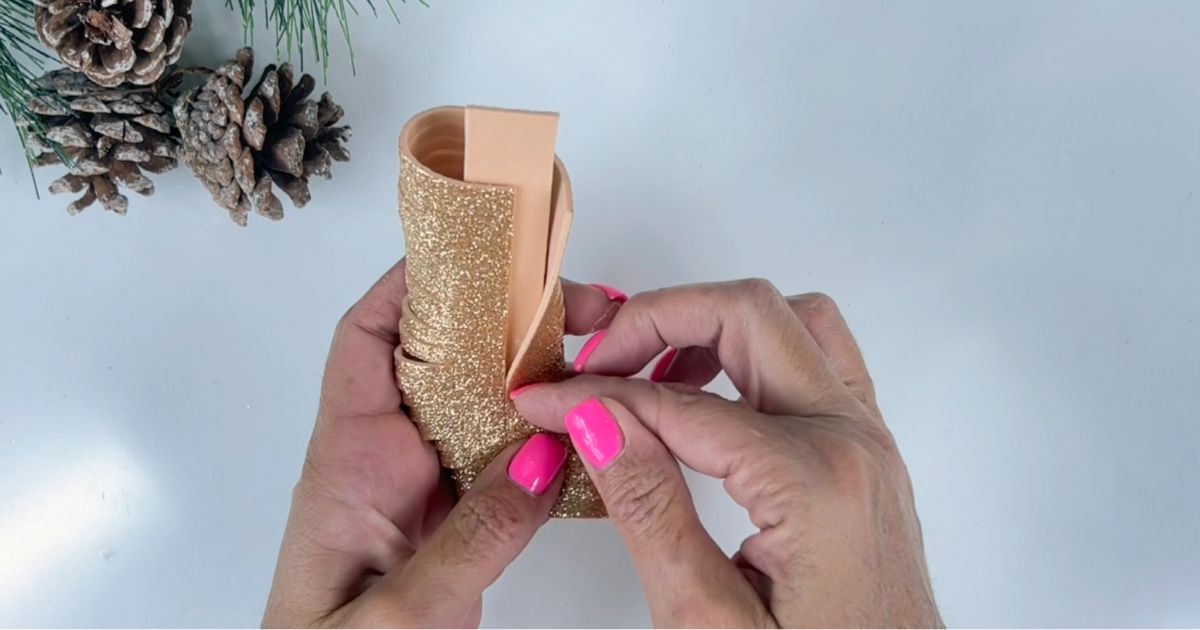
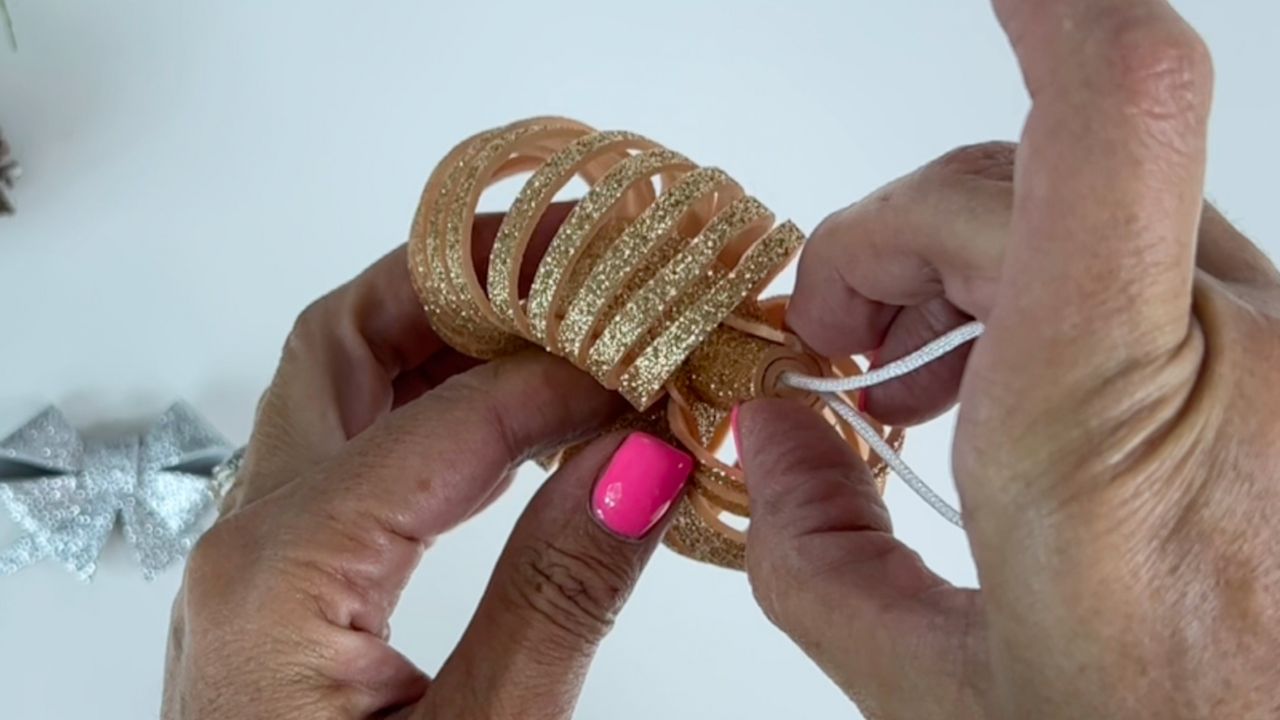
Step 6: Close the wreath
To close the crown, take the excess foam rubber and glue it over the other end as shown in the following photo.
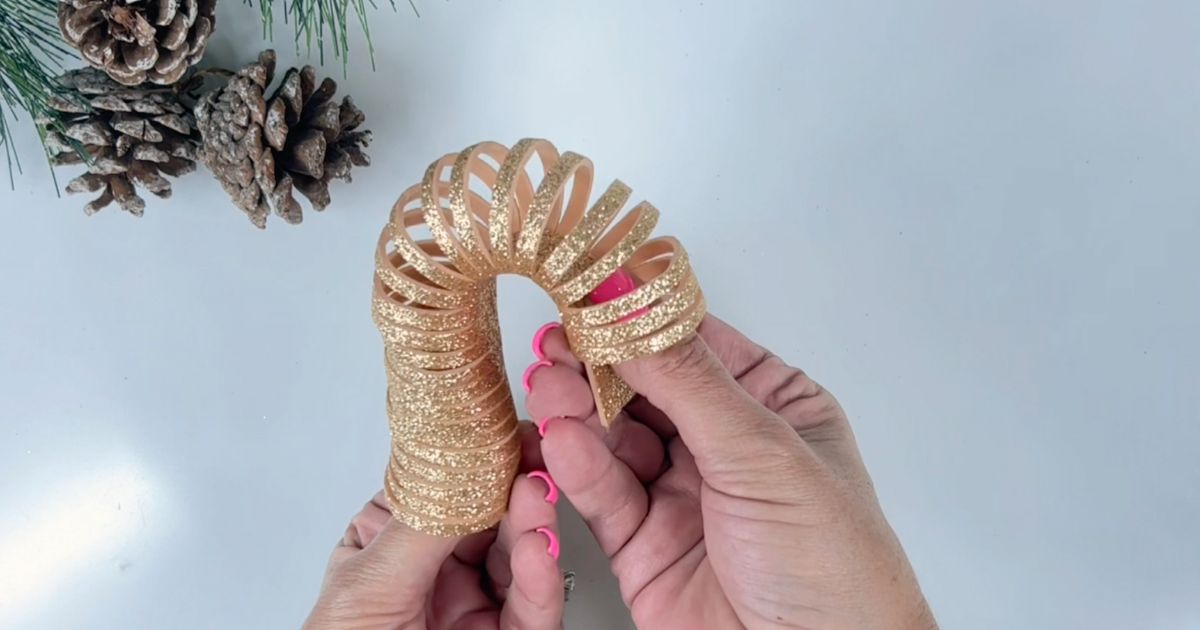
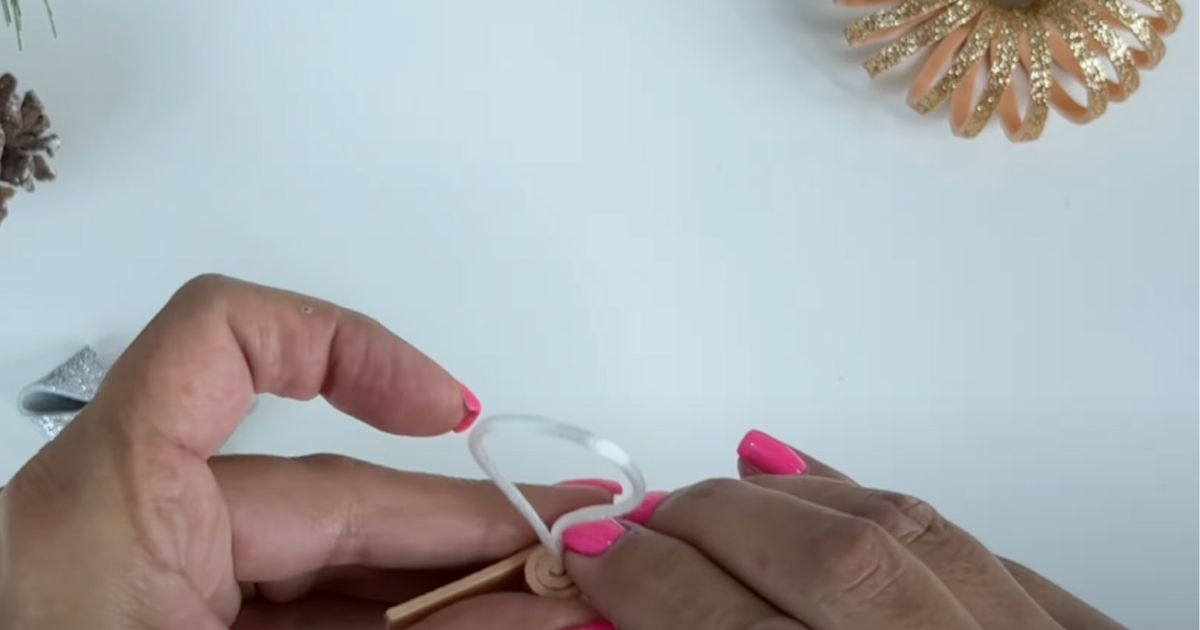
Step 7: Add a Cord
To hang your ornaments on the tree, you need to add a strong cord or thread. Make a loop with it and glue it to the piece you cut at the beginning (1.5 cm x 8 cm). Glue the loop at one end and start rolling it to form a small cylinder. Then glue it to the crown you just closed.
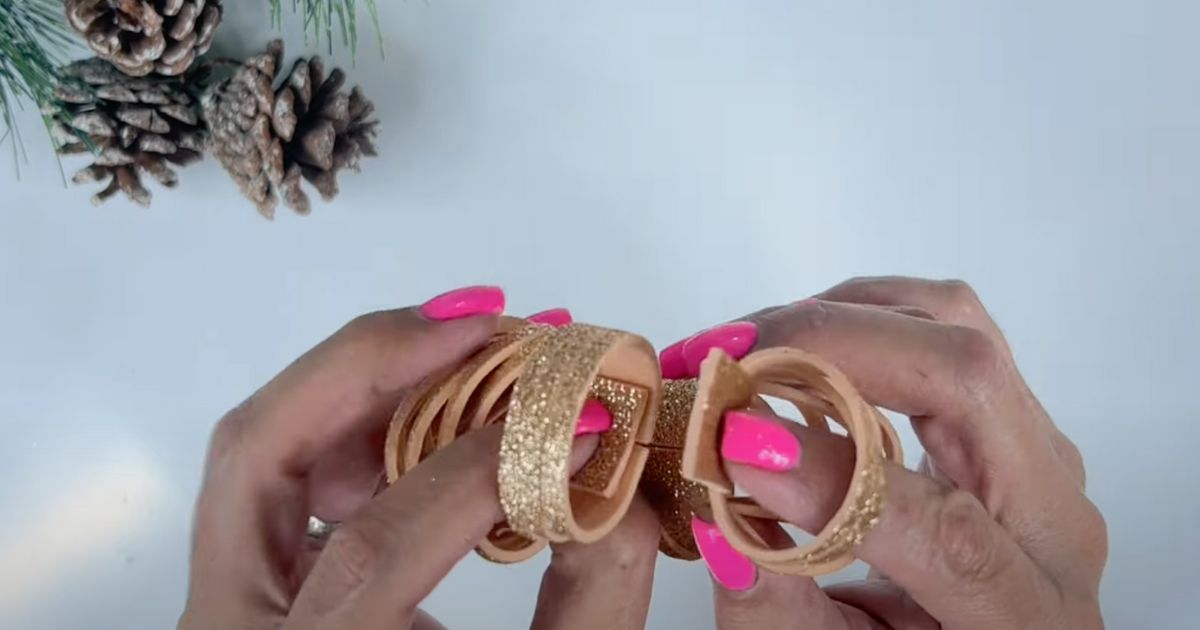
Step 8: Make a Decorative Bow.
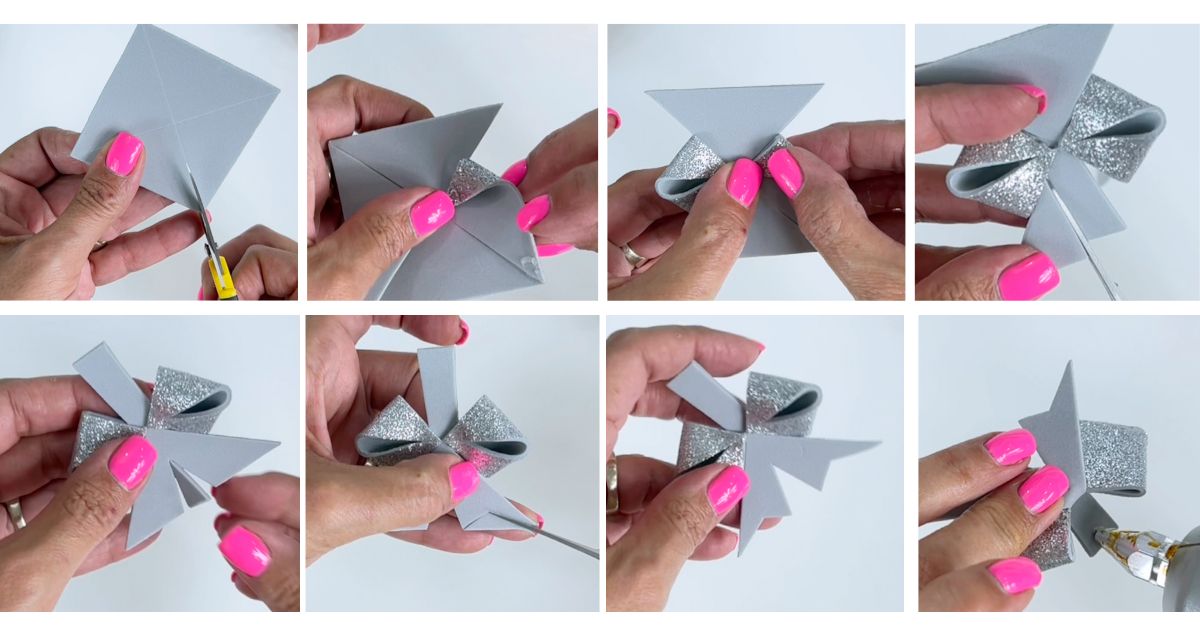
Step 9: Now all that’s left is to decorate with what you have on hand. In my case, I used little diamonds on the wreath and in the center of the bow.
And now it only remains to decorate with what you have on hand. In my case, I used little diamonds on the crown and in the center of the bow.
These ornaments are not only beautiful in themselves, but they are also a meaningful gift. You can create them to give to your loved ones and friends, sharing the joy and Christmas spirit in a truly special way.
The process of making these ornaments is more than a craft activity; it is an act of love and care that we can share with our families.
Customize Your Tree with Creativity:
Once you master the technique to make these Christmas ornaments with foam rubber, your Christmas tree will transform into a personal expression of art and creativity. Each ornament will be a unique piece, adding a special touch to your festivities.
Foam rubber, with its versatility and range of colors, allows you to experiment and personalize your creations. Whether you prefer classic Christmas tones or opt for something more modern and daring, these ornaments will reflect your taste and preferences.
Creativity as a Gift:
Creativity is a gift that we all possess. The Christmas season is the perfect time to put our imagination and manual skills into practice. Christmas ornaments are a wonderful expression of our creativity, adding a personal and unique touch to our festivities.
I encourage you to dive into this craft project and enjoy every step of the process. Remember, creativity knows no limits, and each ornament you create is a unique representation of your Christmas spirit.
In Summary:
This tutorial is more than a simple guide to making ornaments; it is an inspiration to explore your creativity and enjoy a festive season filled with unique ornaments made with love. I hope this creative journey has inspired you, and I wish you a Christmas season full of joy, creativity, and love.
Happy holidays, and may your tree shine with your beautiful handmade foam rubber ornaments!
You may also like: How to make flowers with foam sheets or foami
Don’t forget to follow us in our Instagram , YouTube Channel and Facebook Group !!!!
DIY Tutoriales y mucho mas articipates in the Amazon Services LLC Associates Program, an affiliate advertising program designed to provide us with a means to earn money through links to Amazon.com and affiliated sites.
This post contains affiliate links and I may be compensated for this post. Read our disclosure policy HERE
Leave a Reply