How to Make an Organizer with Wooden Sticks?
Welcome back to our craft blog! Today, we are thrilled to share with you an exciting DIY project that we’re sure you’ll love. This time, we’re diving into the fascinating world of crafting with wooden sticks, and we’ll learn how to make a unique and functional organizer. Organizers are essential tools to keep our lives in order, and the best part about this project is that it’s not only practical but also highly customizable.
If you’ve ever wondered what to do with those wooden sticks you have lying around, you’ve come to the right place! Throughout this tutorial, we will guide you through the steps to create your own wooden stick organizer, and we guarantee that the final result will surprise you. So, get ready to unleash your creativity and transform simple wooden sticks into a masterpiece of organization.
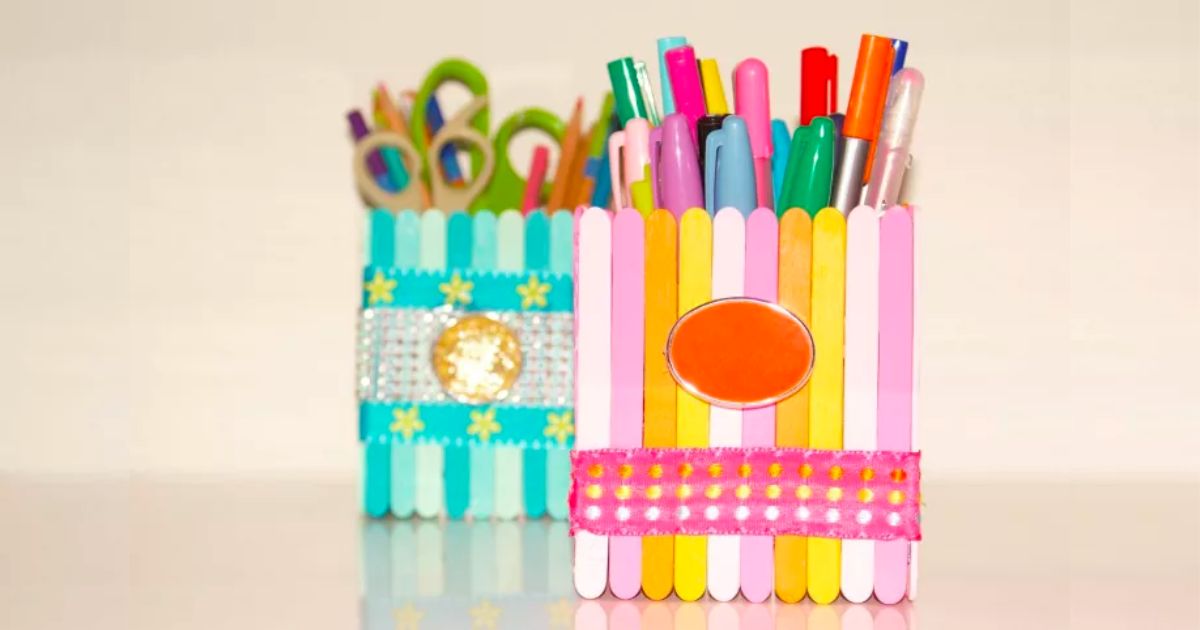
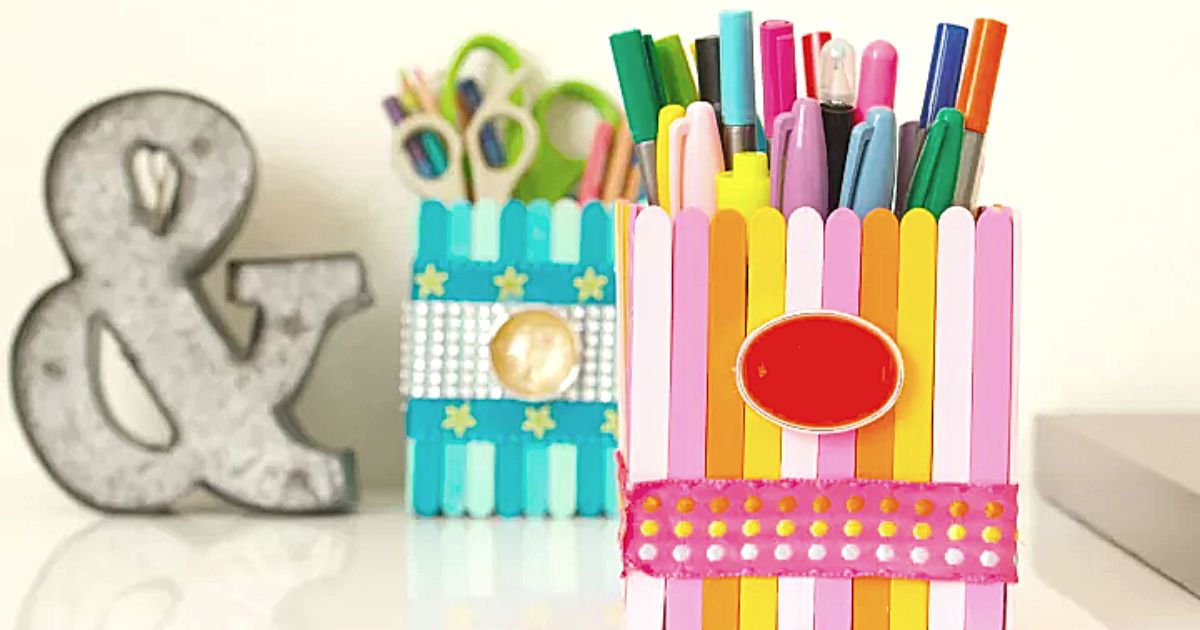
Hello, today I am bringing you a DIY idea to make a simple organizer for your pencils, scissors, pens, ruler, or any other objects you want to keep in place.
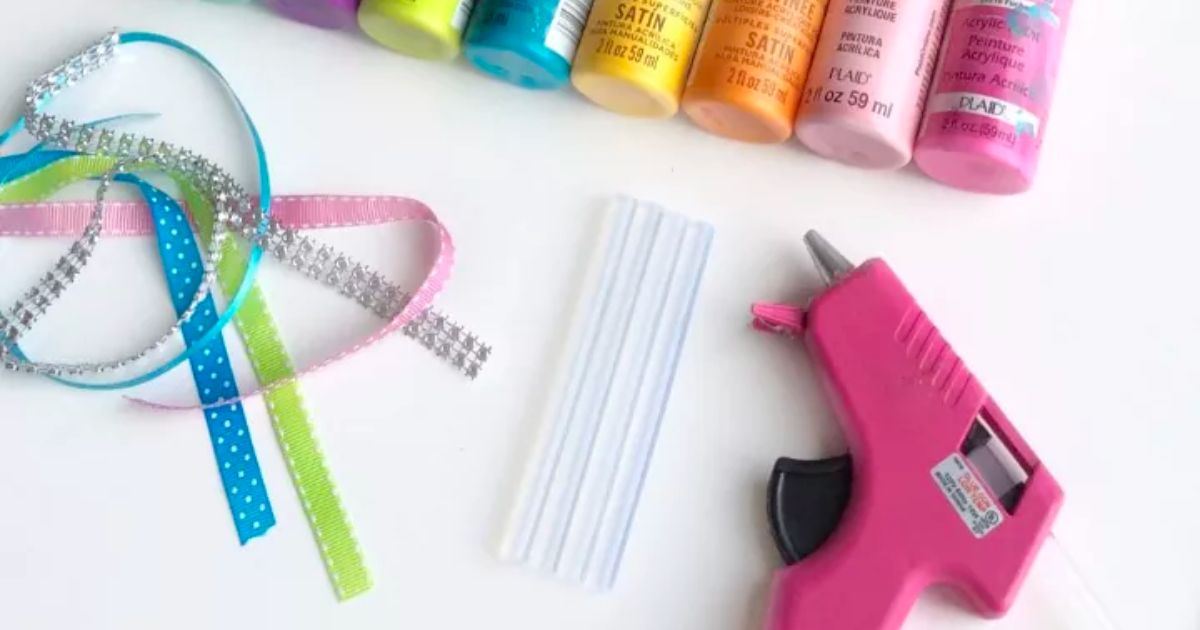
Materials:
- acrylic paints
- wooden sticks
- glue gun
- glue sticks
- ribbon
- paintbrush
First, take a moment to carefully consider the colors and width you want to use to personalize your organizer using wooden sticks. This design choice is an exciting opportunity to express your style and creativity. You can opt for a specific color palette that harmonizes with your space’s decor, or you can choose a combination of vibrant colors to add a touch of joy and energy.
If you prefer simplicity and elegance, you also have the option to leave the sticks in their natural color. The choice is yours, and this initial stage is crucial to ensure that your organizer reflects your personal preferences and perfectly suits your organizational needs. So, take your time to explore all the possibilities before moving on to the next step in this tutorial.
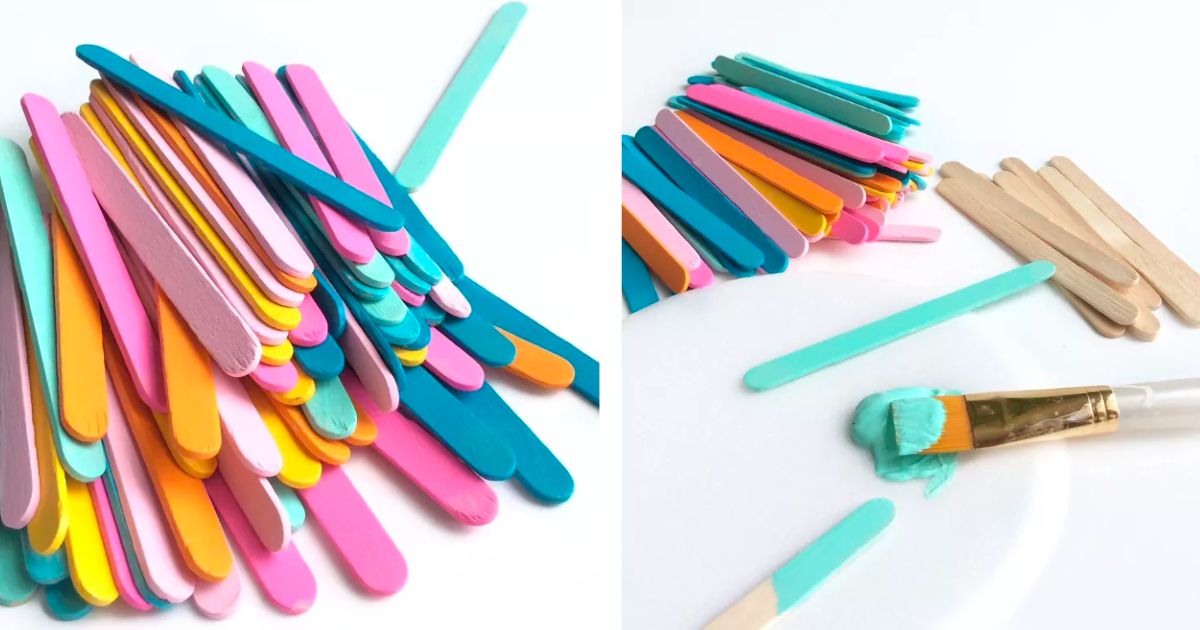
Once you have painted all the sticks, arrange them according to your desired color combination. Then, continue adding more sticks until you have achieved the specific width you want for your organizer or box.
This process will allow you to create a color pattern and design that perfectly aligns with your creative vision, ensuring that the final result is both functional and aesthetically appealing.
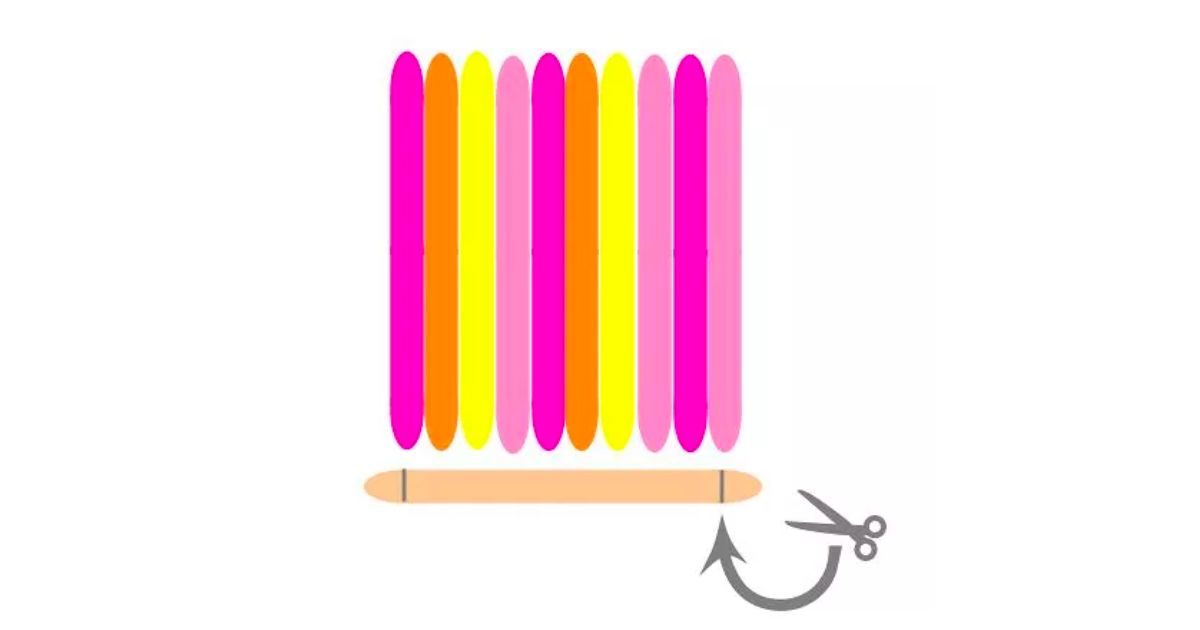
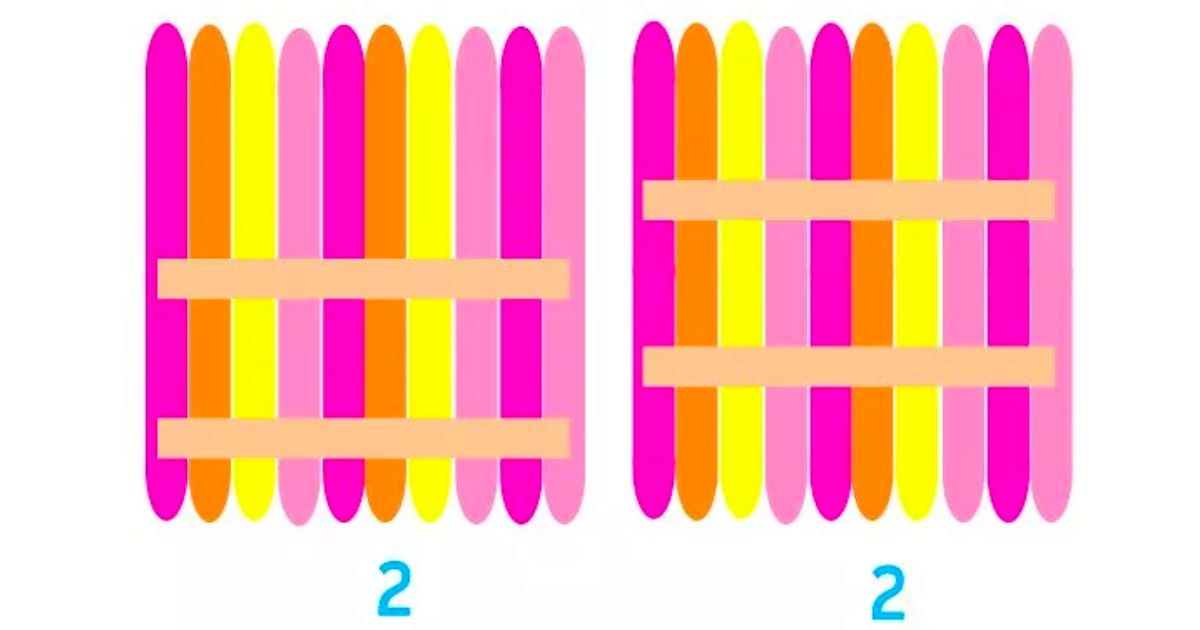
To complete this phase of the project, you will need to make a few additional cuts in the wood. Specifically, you’ll have to cut two sticks for each of the quadrants or sides of your organizer. These sticks will play a crucial role in creating the base of the organizer, ensuring its stability and durability over time.
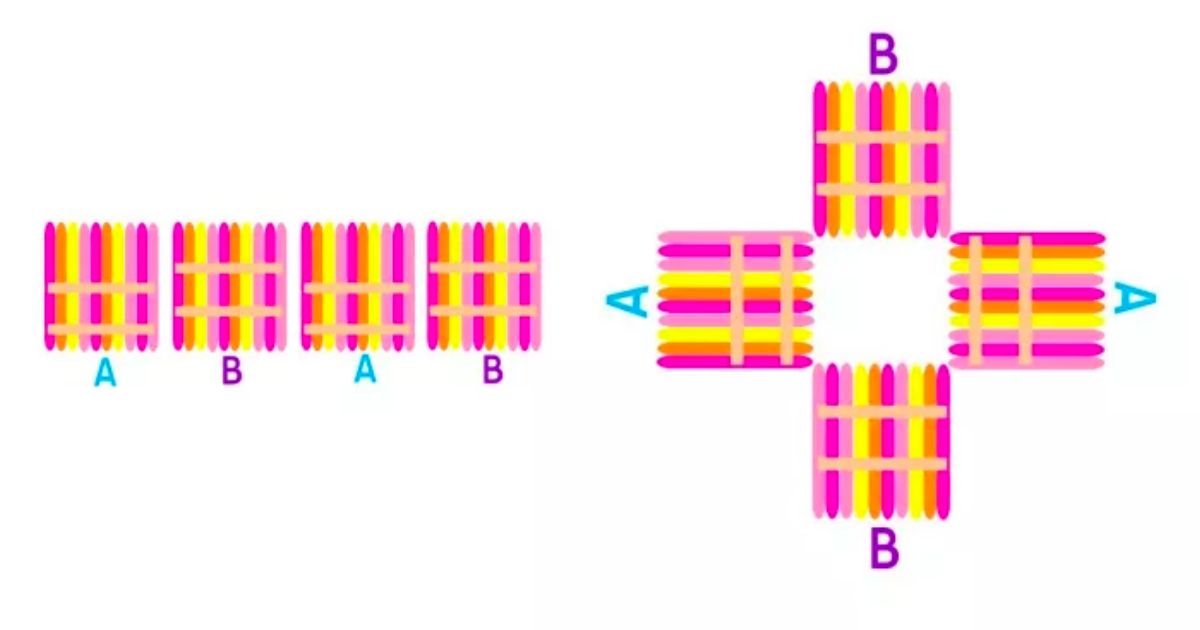
Take a close look at the image shown below, where the arrangement of the sticks in the different quadrants is clearly depicted. You’ll notice that in two of the quadrants, the sticks are aligned in a specific direction, while in the other pair of quadrants, the orientation of the sticks is different. This design has been devised to prevent the corners of your organizer from colliding with each other, providing a uniform appearance and greater structural support to the whole assembly.
At this point, you will have four quadrants, two of each, and you need to arrange them as shown in the picture below.
And there you have it! A very nice, economical, and useful craft.
Conclusion for this tutorial on How to Make an Organizer with Wooden Sticks?
And there you have it, your very own organizer made with wooden sticks. Congratulations on completing this exciting craft project! We hope you enjoyed it as much as we did, creating this useful and beautiful organization piece.
The beauty of making your own organizers is that you can tailor them to your specific needs and customize them with your unique touch. Additionally, using recycled materials like wooden sticks adds a sustainable element to your creation.
This organizer is not only functional but also a lovely decorative piece for any space. Whether it’s on your desk, in the kitchen, or in your workspace, this wooden stick organizer is sure to attract admiring glances and questions about how you made it. Don’t hesitate to share your artistic skills and encourage creativity in those around you.
We hope this tutorial has inspired your creative side and that you feel encouraged to embark on more craft projects in the future.
Don’t forget to follow us in our Instagram , YouTube Channel and Facebook Group !!!!
DIY Tutoriales y mucho mas participa en el Programa de Asociados de Amazon Services LLC, un programa de afiliación publicitaria diseñado para proporcionarnos un medio para que ganemos dinero a través de los enlaces de Amazon.com y sitios afiliados.
This post contains affiliate links and I may be compensated for this post. Read our disclosure policy HERE.
Leave a Reply